Calendar channels
Calendar channels are locations in your digital workplace where you create and store calendar events. These events can be for but are not limited to corporate events, team meetings, and out-of-office tracking. Your digital workplace can have many calendar channels, each focusing on a specific niche event type or targeting a particular type of user. By going to a calendar channel, users can view a feed of its events and subscribe to receive email notifications when an author posts a new event.
Users will only see events that they have at least Read access to.
Go to one of the following sections in this article:
Considerations and caveats
- Initial access rules: When you first create a Calendar channel, it will inherit any cascading, anonymous, and author access rules from the page or space above it. However, if you create this channel at the root of your digital workplace, the channel will be given the same cascading specific access rules as your digital workplace's current homepage. At the same time, the channel's anonymous access rule will receive a value of No Access, while the author access rule will receive a value of Full Access. Since the specific access rules are placed on the channel, not inherited, they will persist even if you move the channel to a different location. To change the access rules on a channel, select
Actions followed by Access to navigate to its Access page.
- Aggregating multiple calendar channels: You can use the calendar events widget to display events from multiple calendar channels in one central location. For more information, see Calendar Events Widget.
- Time zone indicators: By default, calendar events that were scheduled in the same time zone as your digital workplace do not have their time zone labeled in the channel's feed. If you want the time zone to be explicitly labeled, select the option Always show time zones on calendar events found on the Localization page of the Control Panel.
- Channel URL: When you first create a calendar channel, its URL will match the title that you've given it. To change the URL of a calendar channel that already exists, see Changing a channel's URL.
Layout

Channel header

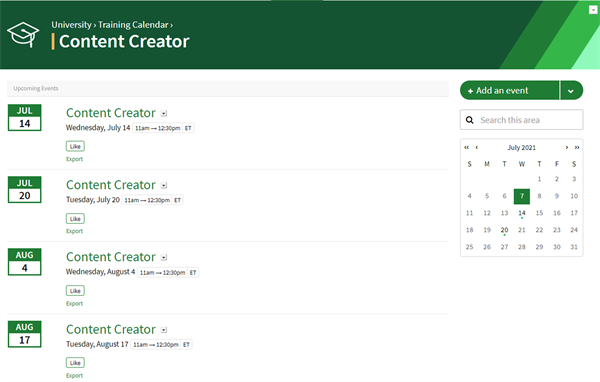
The channel header is shown below your workplace's navigation bar and above the content of the channel. It contains the following features:
- Breadcrumbs: Select to go to a location.
- Channel title: If enabled and configured on the channel, a color bar showing the channel's color will be shown next to the title of the channel and the title of events on the channel.
Actions button: Visible to those with at least Edit access to the channel. Select for additional options.
The feed

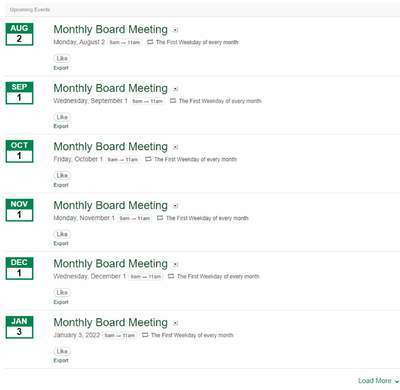
The calendar channel feed occupies the majority of the space on a calendar channel. This feed initially shows up to 25 upcoming events that occur within the next 6 months. However, you can view events that occur further in the future by selecting Load More below the feed. Note that when a user first clicks Load More, it will only attempt to show events between the current date and 6 months in the future; a second click is required to show events that may occur after 6 months from the current date.
The feed shows these properties of an event:
- Title: Select to go to the event.
Actions button: Visible to those with at least Edit access to the event. Select for additional options.
- Archived: Visible if the event is archived.
- Date and time: This shows when the event occurs and if it is part of a recurring series.
- Summary: This shows the summary section of the event.
- Comments: Visible when there are comments on the event. This shows the number of comments. Select to go to the comments section of the event.
- Like: Select to like the event. Select the number of likes to view who has liked the event.
- Export: Select to download the event as an ICS file.
Side panel

The side panel of a calendar channel provides metadata about the channel and additional actions for users based on their access. Features include:
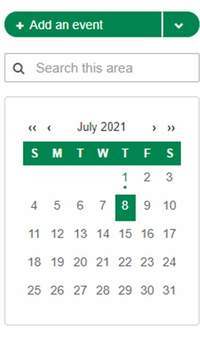
- Add an event: Visible to those with at least Write access to the channel. Select to begin creating a new event on the channel.
- Add an event dropdown: If Email Content is enabled on the channel, this option is visible to users with at least Write Access to the channel. Selecting this brings up a menu with this option:
- Download Contact Card: Select to download the VCF file for the channel.
- Search box: If enabled, search for content on only the current channel.
- Calendar: This shows events that have been created on this channel. Select days that have a dot to view the events on that day. Select < or > to cycle between months, and << or >> to cycle between years.
Channel trailer bar
.png?width=600)
The channel trailer bar is shown below the contents of the channel and above the workplace's footer. Features include:
- View count: This shows the number of views on the current location.
- Follow: Select to subscribe/unsubscribe from email notifications about new events being added to the current location and set the frequency of these notifications.
- Share: Visible if the channel allows anonymous access. Select to share a link to the current location to social media sites. To configure which social media sites can be selected, go to the Social Media Sites page of the Control Panel.
- Email Link: Select to draft an email that contains a link to the current location.
- Broadcast: If enabled in the workplace, select to broadcast a link to this location to select workplace groups; see Broadcast.
- Feedback: If enabled in the workplace, select to send a feedback message to workplace administrators; see Feedback.
Creating
The workflow for creating a calendar channel depends on what type of administrator a user is.
Workplace administrators can create a calendar channel by following these steps:
- Select
Control Panel.
- Under Presentation, select Site Manager.
- Select Add followed by Calendar.
- Complete the provided fields:
- In the Title text box, enter a name for the channel.
- Use the Location selector to select where to create the channel. You can use the search function above the selection list to return up to 100 results that match your query. Only Pages and Spaces to which you have at least Read Access are visible.
- For Hide from navigation, select if you want to hide the channel from navigation menus.
- Select Add to create the channel.
Space administrators can create a calendar channel by following these steps:
- Go to the space.
- On the space's navigation bar, select
Administration followed by Navigation.
- Select Add followed by Calendar.
- Complete the provided fields:
- In the Title text box, enter a name for the channel.
- Use the Location selector to select where to create the channel. You can use the search function above the selection list to return up to 100 results that match your query. Only Pages and Spaces to which you have at least Read Access are visible.
- For Hide from navigation, select if you want to hide the channel from navigation menus.
- Select Add to create the channel.
Regardless of the method used to create the channel, you should explore configuring the channel once created. See the next section for the configuration options that are available for calendar channels.
Configuring
To configure a calendar channel, go to the channel and select Actions. From the actions menu, explore each of these options to configure your channel:
- Edit: Configure the following (if your digital workplace supports multiple languages, use the language tabs and translation button to ensure that any text that you enter is readable in all your supported languages):
- Title: Enter a new title for the channel.
- Custom content: Enter custom content for the channel. This content is shown above the event feed.
- Advanced: Modify the page title, enhance how external search engines index a page (if your site is public), and add custom JavaScript code and CSS to the channel's page. For more information, see Advanced page.
- Access: On the Access page, you can control how users and groups interact with the channel and its contents. For more information, see Access rules.
- Subscriptions: Control what groups are subscribed to the channel and at what frequency they will receive notifications. In addition, you can control whether auto-following occurs. For more information, see Subscriptions.
- Channel Template: Use the editor to enter text, headings, and other content to pre-populate for all events created on the channel. Then, when a user begins creating a new event, the template contents appear in the user's editor. For more information, see Channel Templates.
- Settings: Configure the following settings for a calendar channel:
- Adding events from third-party calendar applications: Select whether users can invite the channel to events created in third-party applications and what email address the channel uses. This action creates an event on the calendar channel. For more information about emailing content into a channel, see Add content via email.
- Labels: Select whether labeling events is mandatory or not. If mandatory, users must apply at least one label to an event before publishing it. For more information, see Labels.
- Anonymous Commenting: If your workplace has public registration and anonymous commenting enabled, select whether anonymous users can comment on events and whether the event's author must approve their comment before displaying it to others. For more information, see Enabling anonymous commenting.
- Comments: Select whether newly-created events have commenting disabled. When enabled, this does not disable commenting on existing content or prevent authors from enabling commenting on specific events. For more information, see Comments.
- Moderation: Select whether the assigned moderators must approve events and comments before being posted. For more information, see Moderation.
- Archiving: Select an archiving policy for events on the channel. For more information, see Archiving.
- Read Tracking: Select whether newly-created events have read tracking enabled and customize the text of this button. When enabled, this does not add read tracking on existing events or prevent authors from disabling read tracking on specific events. For more information, see Read Tracking.
- Search Box: Select whether the channel and events have a search box included in the same column that includes the information panel. This search includes only events on the same channel. For more information, see Search.
- Channel Color: Select a color to associate with the channel. This color appears as an accent on the channel and events names and helps differentiate the channel in widgets that aggregate content from many channels. For more information, see Channel Colors.
Auditing
To better understand how users are interacting with the channel, go to the channel and select Actions. From the actions menu, explore each of these options:
- Activity: View what actions (e.g., views, edits, etc.) users have been performing on the channel and when they did them. This page only tracks activity on the channel itself and does not include activity on events that are on the channel. For more information, see Activity page.
- Manage: View the status (e.g., draft, published, unpublished, and in review) of events on the channel. For more information, see Manage - Action Button.
For more in-depth auditing, see Data feeds or the Insights program.
Moving
The workflow for moving a channel depends on what type of administrator you are.
Workplace administrators should refer to Site Manager.
Space administrators should refer to Navigation page.
Deleting
While on the channel, select Actions followed by Delete to send the channel and its content to the trash can. For more information, see Trash Can.
Creating events
For information about adding content to a calendar channel, see Calendar events.