Widget Tabs enhancement
Layer multiple widgets into a single location on a Page with the Widget Tabs enhancement. Use this to reduce clutter and information overload on information-dense pages by presenting content based on the user's needs. Widgets sharing this enhancement display their titles in a list of tabs. Users can click a tab to show the content of the associated widget.
Widget Tabs always involve an HTML widget that acts as an index of the contained tabs and then any number of other widgets that you want to appear as tabs. How you place the HTML widget and what classes you use determines whether the tabs will appear horizontally or vertically.
If your workplace already has this enhancement, you can find configuration steps on your Styles page.
Sections in this article:
- Request enhancement
- Examples
- Considerations and caveats
- How to create horizontal tabs
- How to create vertical tabs
- How to create tabs that contain multiple widgets
- How to create multiple groups of tabbed widgets
- How to add icons to tab labels
Request enhancement
To request this enhancement, please complete and submit an Enhancement Request Form.
Examples
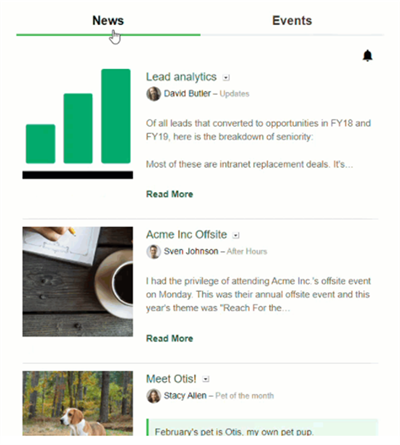
Example of horizontal tabs with two widgets

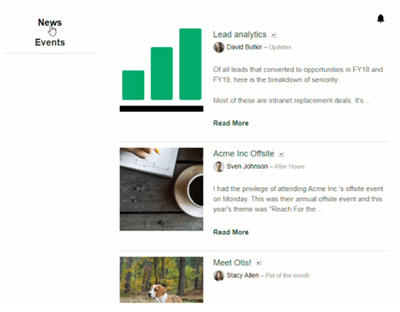
Example of vertical tabs with two widgets

Considerations and caveats
Follow these best practices when creating widget Tabs:
- When using horizontal tabs, try to limit yourself to a maximum of 4 tabs to ensure that the tab titles are easily readable.
- Place widgets that share a tab group in the same Page Row section.
- Do not use the Widget Tabs enhancement in combination with the:
- Do not use the following widgets with the Widget Tabs enhancement:
- RSS Feed widgets
- Photos in Folder widgets
- Content Slideshow widgets
- HTML widgets that contain embedded content (e.g., content in an iframe or content that uses JavaScript)
How to create horizontal tabs
Create Horizontal Tabs by placing an HTML widget above the widgets that will act as tabs.
- Place the widgets you want to layer into tabs within the same Page Row section.
- Place an HTML widget above the widgets that will act as tabs.
- Add the ps-tabs class to the HTML widget. Refer to the article Applying custom CSS to widgets if you are unsure how to apply CSS classes to a widget.
- Add the ps-tab class and a title to each widget that you want to be a tab. You can enter a title into the Title text box found on the Options tab of the widget. These titles will be what appear on the tabs.
How to create vertical tabs
Create Vertical Tabs by placing an HTML widget next to the widgets that will act as tabs.
- Place the widgets you want to layer into tabs within the same Page Row section.
- Place an HTML widget next to the widgets that will act as tabs.
- Add ps-tabs and tabs-style-vertical classes to the HTML widget. Applying custom CSS to widgets if you are unsure how to apply CSS classes to a widget.
- Add the ps-tab class and a title to each widget that you want to be a tab. You can enter a title into the Title text box found on the Options tab of the widget. These titles will be what appear on the tabs.
How to create tabs that contain multiple widgets
In addition to setting up your tabs, add the multi-tab-x (replacing x with a meaningful name that contains only lowercase characters) class to the widgets you want to group in the same tab. In the image below, widgets with the multi-tab-first class will appear in tab 1, while widgets with multi-tab-second will appear in tab 2. The label on the tab will be the title of the first widget in the group.
How to create multiple groups of tabbed widgets
In addition to setting up your tabs, add the tab-group-X (replacing X with a meaningful name) class to widgets that you want together. You don't need to do this if you only use one group of tabs on a page. In the image below, widgets with the tab-group-cat class are grouped, and widgets with the tab-group-dog class are grouped.
How to add icons to tab labels
In addition to setting up your tabs, add the graphical class to the HTML widget with the ps-tab class and the icon-X class to the related widgets (these should already have the ps-tab class). When using icon-X, replace X with the name of a Font Awesome icon (only version 4 icons are supported). In the image below, the icon-fa-twitter is added to the first widget, and the icon-fa-instagram class is added to the second widget.