Blog Articles Widget
What is it?
Use the Blog Articles Widget to aggregate and display Articles from multiple Blog Channels on a Page or Space. Articles displayed in the Blog Articles Widget will appear in chronological order.
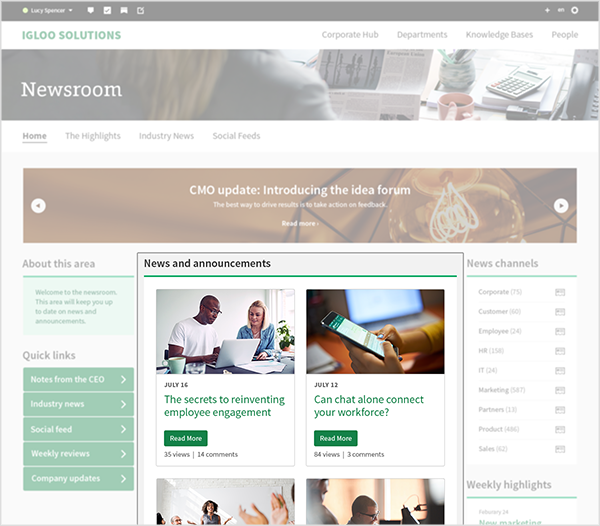
Configuration settings
Options tab
Title
Enter a title for the Widget. The title appears as a heading above the Widget's contents. You should use the title to provide users with an idea of why the Widget's content is important to them or to highlight the content's purpose. Titles also serve to better structure the content of a page by clearly denoting different sections.
When entering a title, you do so only for your currently selected language. If your digital workplace supports multiple languages, you should click the field's Translation button () and enter a title for each supported language.
Title link
Enter the URL of a location in your digital workplace. Users who click the Widget's title, if it has one, will go to this location. Whether you enter the link as a relative URL or an absolute URL does not matter, it will convert to an absolute URL the next time you edit the Widget.
Description
Enter a description for the Widget. The description appears between the title and the Widget's contents. You can use this text to provide additional context to the Widget or instructions for using the Widget.
When entering a description, you do so only for your currently selected language. If your digital workplace supports multiple languages, you should click the field's Translation button () and enter a description for each supported language.
Source(s)
Select from which Blog Channel(s) the Widget displays content. Access Rules determine what users will see when configuring and viewing the Widget:
- Users who are configuring this Widget will only see Channels to which they have at least Read Access. Users can still select Blog Channels that they don't have Access to by selecting groups of Blog Channels (see step 4 of "To add sources" below).
- Users who view the published Widget will only see content from a Blog Channel if they have at least Read Access to that content.
To add sources:
- Click "add source(s)".
- Select the Blogs tab.
- Search for a Blog Channel by its name or a portion of its URL. This search will return up to 100 results and include the Pages and Spaces that contain a Blog Channel that matches the search query.
- Select a Blog Channel from the list of search results. In addition to selecting sources individually, you can select groups of Blog Channels:
- Select the All option to select all Blog Channels in your digital workplace.
- Select Pages or Spaces to select all Blog Channels below that location.
- Repeat this process until you have added all your sources, and then click Done.
To remove sources:
- Click "add source(s)".
- While on the Selected tab, unselect the source(s) that you want to remove.
- Click Done.
Number of results
Enter the maximum number of results to increment by, and to display initially. You must enter a value between 1 and 99. If there are additional items to display, users can click the Load More link found at the bottom of the feed to load additional results.
Show add link
Select to add an "Add Article" button to the Widget. Only users with at least Write Access to any of the connected Blog Channels can see this button. Users can click this button to add content to Blog Channels to which they have at least Write Access.
Show follow icon
Select "Show follow icon" to add a Follow button() to the Widget. Users can click this button to subscribe to all Channels displayed in the Widget to which they have at least Read level Access.
Layout tab
Change how Blog Articles appear in the Widget using the Layout tab. Use Full view when the Blog Widget is placed in the center or wide columns, and Compact view when the Blog Widget is placed in a narrow side column. Only the first image of a Blog Article will be displayed when it is featured in the Blog Article Widget.
Full View provides the ability to show pinned articles, and select what elements of a Blog Article are displayed in the Widget with its Advanced Options. Advanced Options allow you to toggle whether the following elements are visible:
- Actions Button
- Author
- Body
- Channel
- Comments
- Date
- Likes
- Rating (As of January 26, 2023, users can no longer rate blog articles. As a result, only ratings that occurred before this change will be displayed. )
- Summary
- User Photo
- Views
The Blog Article Widget can display the first image that appears in a Blog article. Since some Blog Articles may not contain an image, administrators can select how the Widget will behave. When the Beside or Above Image Position options of Full View are selected you can decide how to handle articles that contain no images. “No image available” provides the following options:
- Show nothing: Displays no image when an article does not have an image.
- Show workplace logo: Displays your digital workplace’s logo when an article does not have an image. This option uses the logo defined on the digital workplace’s Appearance Page.
- Show uploaded default image: Displays the uploaded image when an article does not have an image. Selecting this option provides the ability to upload the default image to the current widget. The max file size for this image is 1MB, and only the following image types are valid: JPG, PNG, GIF, SVG, and BMP.
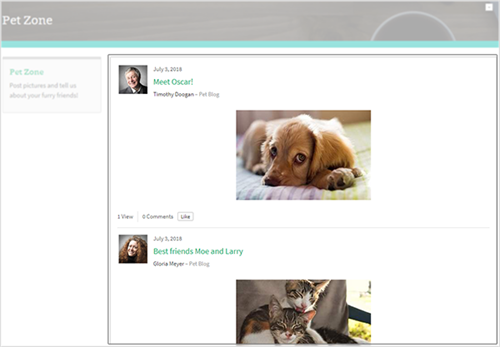
Full View with images Inline of Blog Article content:
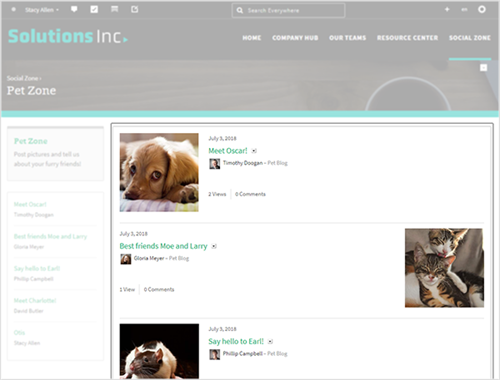
Full View with images alternating Beside Blog Article content. Blog Articles are displayed in a Continuous Feed:
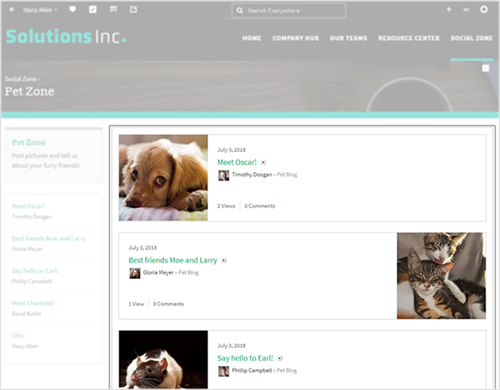
Full View with images alternating Beside Blog Article content. Blog Articles are displayed in as Cards:
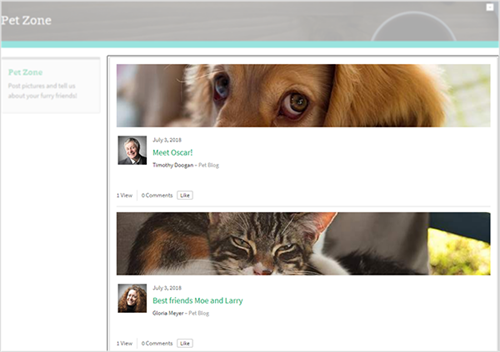
Full View with images Above Blog Article content. Blog Articles are displayed in a Continuous Feed:
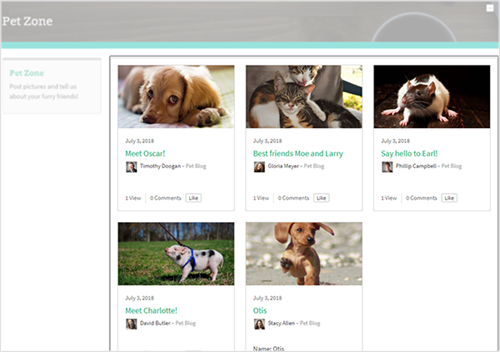
Full View with images Above Blog Article content. Blog Articles are displayed as Cards across 3 columns:
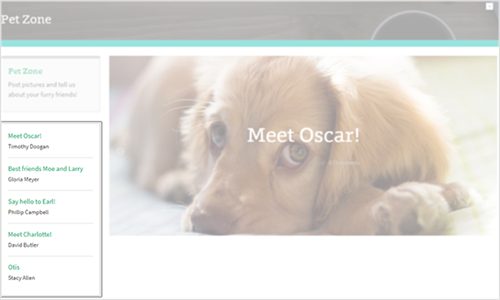
Compact View with no images from Blog articles displayed:
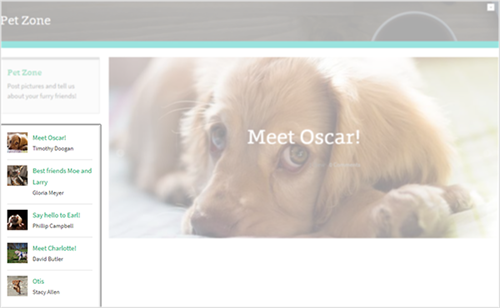
Compact View with images displayed beside Blog Article content:
Compact View with images displayed above Blog Article content:
Appearance tab
Use the Class field to add custom CSS to this Widget.
Your digital workplace's CSS theme overrides other settings on this tab.
Using the Blog Articles Widget
Once configured, the Blog Articles Widget will automatically display Articles from connected sources in chronological order. Click an Article’s Title, Image, Comments or Read More button to navigate directly to the Article. If the Article’s Image Position has been set to Inline, clicking the image will not result in navigation to the Article.
The Blog Articles Widget will follow the Access Rules on the Articles it is displaying. A User will not see an Article in the Widget if they do not have Read Level Access or higher on it.
Image sizes
Position | Layout | Width (px) | Height (px) |
|---|---|---|---|
Full Page Width | Beside > Continuous | 180 | 180 |
Beside > Card | 200 | variable | |
Above > Continuous | 1100 | 140 | |
Above > Cards > 1 Column | 1100 | 140 | |
Above > Cards > 2 Column | 534 | 140 | |
Above > Cards > 3 Column | 347 | 140 | |
Two Column | Beside > Continuous | 180 | 180 |
Beside > Card | 200 | variable | |
Above > Continuous | 860 | 140 | |
Above > Cards > 1 Column | 856 | 140 | |
Above > Cards > 2 Column | 414 | 140 | |
Above > Cards > 3 Column | 235 | 108 | |
Middle Column | Beside > Continuous | 180 | 180 |
Beside > Card | 200 | variable | |
Above > Continuous | 620 | 140 | |
Above > Cards > 1 Column | 616 | 140 | |
Above > Cards > 2 Column | 294 | 140 | |
Above > Cards > 3 Column | 187 | 140 |
In addition to these sizes, images will also behave in the following ways:
- Images are responsive to changes in browser width. Reducing the width of the browser window will reduce the width provided to images within Blog Articles Widget.
- At narrow browser window widths, images using the Beside layout will appear above the Blog Article.
Set up
You can follow the standard Widget placement and set up steps for this Widget. You may find it helpful to leave this article open as a reference for what specific configuration settings do.