Add a Task
What is it?
Your userbar allows you to quickly create tasks in a variety of places in your digital workplace.
These tasks are private. They are only visible to you unless you choose to assign them to someone else in your workplace.
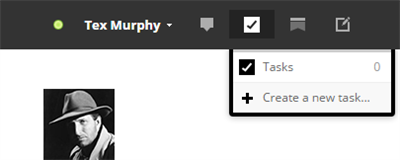
You can add them to any piece of content like files or blogs, or on task list channels. These tasks will be visible to anyone who visits that area unless marked private by the creator.
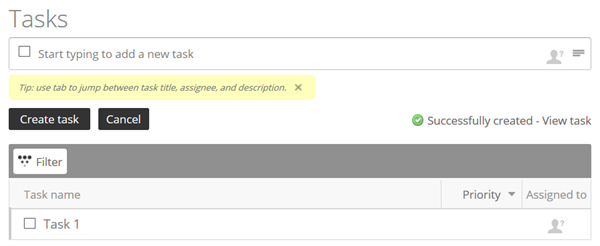
Check out our Task Channel article for a description of tasks, some use cases, and a few friendly tips and tricks.
Features and functionality
There are a number of ways you can use our platform to do exactly what you want. Below is a list of all additional features.
Filter -You can filter your task using one or more of the criteria available. Available filter criteria are categorized by: Assigned to, Importance, Due Date, Status, and assigned by. You can select as many of the criteria items listed under each category as needed to get your desired results.

Note: There is a number shown in each filter item that represents how many tasks fall into that specific category.
Assigned to - use this feature to assign a task to another person. The person will be notified of the assigned task by email and the task will also be added to their To Do list.
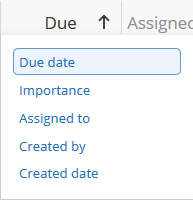
Priority - You can rearrange the order of your task list using the Priority feature. You can rearrange your tasks by the following criteria:
- Due date
- Importance
- Assigned to
- Created by
- Created date
- Importance
Note: The arrow that appears after you select a different item from the menu, allows you to change the order to ascending or descending.
Task Tabs

Task - This is the main task editor. This tab allows you to edit your task, and shares some general information about a task such as: importance, due date, creation date, task author, who the task has been assigned to and what channel the task resides on.
On content tasks and task channels you can also create subtasks here.
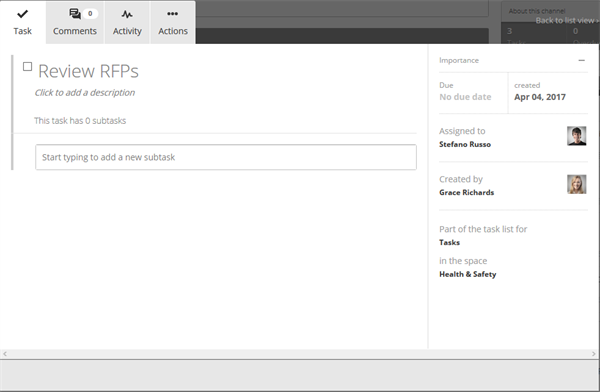
Comments - You can add a comment to any task you have access to. Comments are logged in the comments tab and tracked in the activity tab of that task.
Activity - The Activity tab tracks all activity happening associated with the task. It will record what activity happened, by whom, and when. It will record the addition of new subtasks, status changes, reassignments, and comments made.
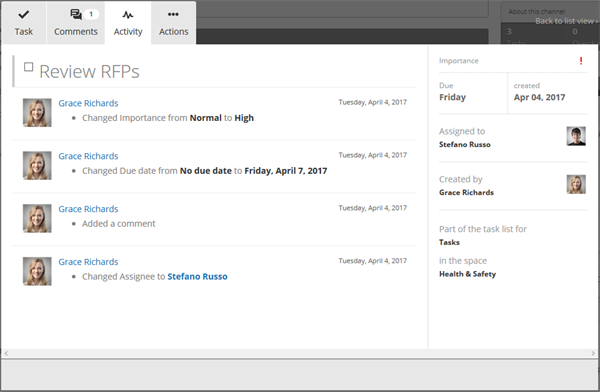
Actions - The Actions tab allows you to reopen a closed task, mark a task as complete, or delete a task.
Task channel features
How to add a task
Adding and assigning tasks provides project members with clear responsibilities and deadlines to ensure the smooth delivery of a project and its requirements. To add tasks and assign people and delivery dates, follow these instructions:
Step 1: Open the Task channel, article, or click the To dos button
Depending on the kind of task you wish to create, you can start in any of three locations: a task list channel, a piece of content like a file or blog, or in the To dos section of your userbar.
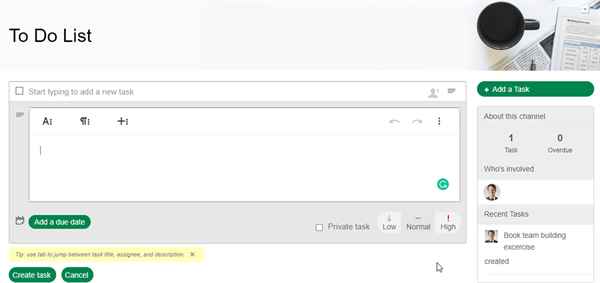
Once there, just start typing in the field that says “Start typing to add a new task.”
Step 2: Give your Task a name
Type the name of your task in the field that reads, "Start typing to add a new Task". Then select, Create Task or select the icon on the far right of your task to get extra options.

Step 3: Add subtasks (optional)
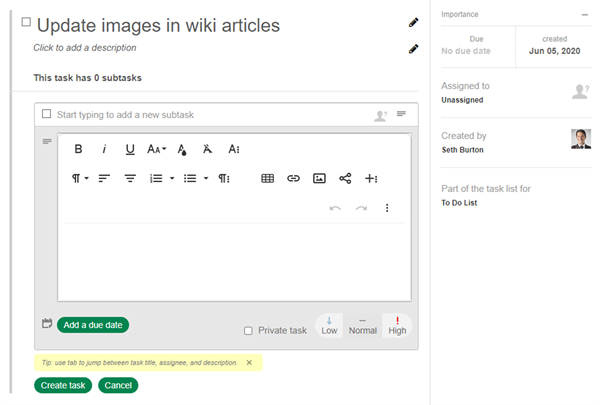
Once a task is created, select the name of the task to open the Task Editor. Start typing to add the description of your new subtask.
Step 4: Add due dates (optional)
When creating a task, open the extra options menu and select, Add a due date to bring up a tool that will allow you to set the due date and time. You will then see a field where you can pick a date, and optionally add a specific time.

When editing an existing task, the due date is shown on the right. Select the date to edit it, or if no date exists, select No due date.
Step 5: Assign the task and any subtasks
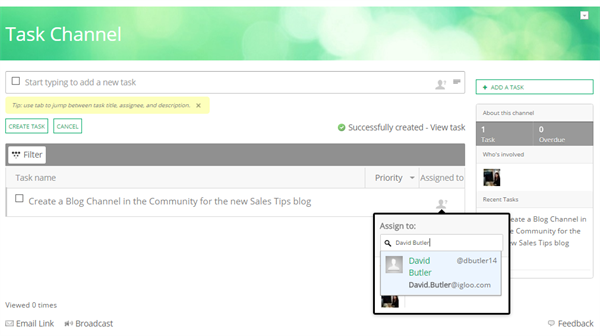
Click the Assigned to icon on any task or subtask. Type the name or email address of the person you wish to assign the task to in the search box and select the appropriate name from the list of options your search provides.
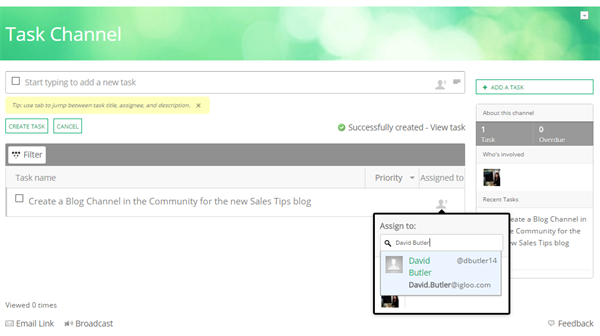
Note: This option is not available for personal tasks in your userbar.
Step 6: Add the Importance (optional)
When creating a task, open the extra options menu and set the Importance by selecting one of the three icons: low, medium, or high.
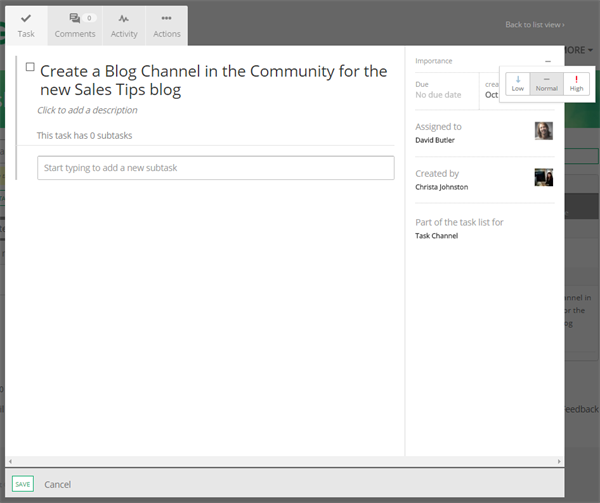
When editing a task, select the dash beside Importance to bring up your three options and then select one of the options.

Step 7: Mark as Private (optional)
You have the option to mark the task as Private when creating or editing a task you don’t want to be seen by anyone but yourself and the assignee.

Note: This option is not available for personal tasks in your userbar, as all tasks there are private.
Frequently Asked Questions
How do I make a task private?
Within the task editor, you also have the option to mark the task as Private if it is a task you don’t want shared.
How can I see only the tasks assigned to me?
The tasks that have been assigned to you are listed in your To Dos. They can be accessed from your userbar.