LDAP Authentication
What is it
LDAP Authentication is one of the three authentication methods available in Igloo. It employs Lightweight Directory Access Protocol (LDAP) for authentication, connecting directly to your Active Directory (AD) Users can sign in to your Igloo using their corporate domain credentials, eliminating the need to keep track of an additional username and password and allowing you to control password complexity and reset policies.
Use cases
LDAP Authentication is typically used when you have an Active Directory but are prevented from using an identity provider to facilitate SAML authentications. It can also be used when you have multiple member directories each with a different membership that needs to log in to your workplace.
Features and functionality
Dual authentication support
When using LDAP Authentication you can also log in using Igloo Authentication. This provides a means to have members of your workplace that are not part of your active directory and a means for administrators to gain access in the case of an LDAP connection issue.
Multiple connections
You can configure your LDAP Authentication to connect to different ADs. When you use this feature, your users will be presented with a list of options when logging in.
Auto Provisioning
LDAP Authentication can automatically add new users to your workplace if they successfully authenticate against your AD.
How to configure an LDAP Authentication connection
Before you can configure an LDAP Authentication connection, you will need an account that can make the LDAP queries on your AD. To create an account that can do this, see How to Create an Active Directory service account for LDAP queries below.
Step 1: Whitelist TCP ports on your network
You must ensure that your AD is able to receive communications from your digital workplace when a user attempts to authenticate. These communications occur over TCP ports 1024-65535. For LDAP Authentication to function, make sure that your firewall and AD server are not blocking these ports.
Step 2: Navigate to the LDAP Connection form
Click on Sign In Settings under Membership inside the Control Panel
Click on Configure LDAP Connections at the bottom of the Sign In Settings page.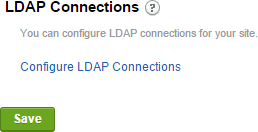
Step 3: Set a title.
Set a title for your LDAP Connection. This should be a friendly name, which will be exposed to your users if you are configuring multiple LDAP connections
Step 4: Enter your directory Server details
To allow your digital workplace to communicate with your AD, enter the following information about your AD server.
- Enter the externally resolvable IP address or hostname of your corporate environment in the Server Name field.
- Enter your Server Port. The standard ports are 389 for LDAP, or 636 for LDAPs.
- Check the SSL button if you are using LDAPS. It is highly recommended that LDAPS is used.

Step 5: Enter Account Credentials
To confirm user credentials against your AD, you need to provide a user account with query access to your AD.
- Enter the query user’s Distinguished Name (DN) from your AD
- Enter the query user’s AD password
- Enter the base OU containing the query user in your AD

Step 6: Enter Profile Attributes
To provision and authenticate your users to the Igloo, there are 3 required fields that need to be populated in the corporate directory. This will prevent service accounts, and non-human user accounts from being added to the Igloo. In a default Active Directory configuration, please map the fields as follows:
- User First Name: givenName
- User Last Name: sn
- User Email Address: mail

Step 7: Create an Account Filter
Enter an LDAP search string to use when querying users in your AD that should be authenticated. Use {0} to specify where in the search query the user entered value should be entered. For example, the query filter (sAMAccountName={0}), for a user who entered “auser” in the username field will perform a search against the BaseDN of (sAMAccountName=auser).
How to Create an Active Directory service account for LDAP queries
Step 1: Create a new user in your AD
Open Active Directory Users and Computers and navigate to the Organizational Unit (OU) where you want to create the read-only service account.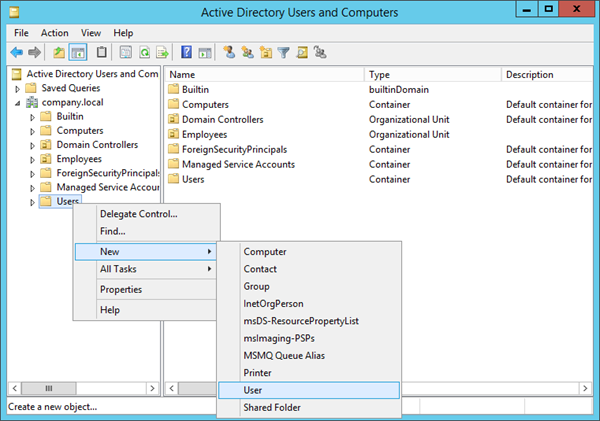
Step 2: Set a name for the user
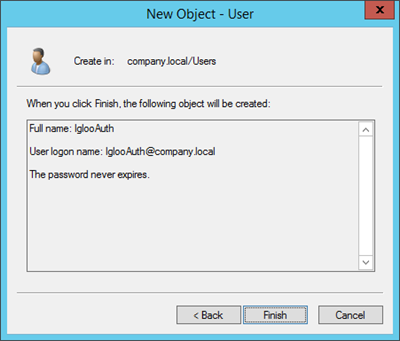
Set the Full name and User logon name.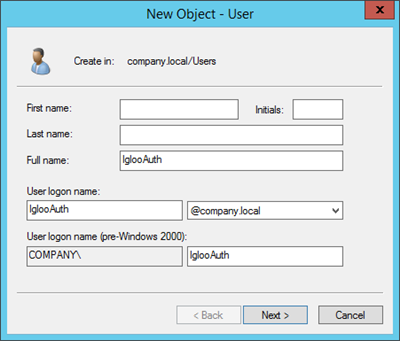
Step 3: Set a password
Set a secure password, disable "User must change password at next logon" and enable "Password never expires "and select Next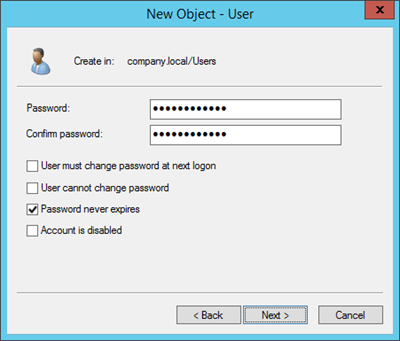
Step 4: Finish
Select Finish to save the new user.